 Asale
AsaleBuying with OpenClaw
OpenClaw speaks whichever wire format it is configured for, which is why it is routed by a path prefix rather than by dialect.
OpenClaw is an open-source AI coding assistant. You need no vendor subscription at all: once the buy switch is on, its requests go through the Asale market and you pay in USDT for the tokens you actually use.
Time needed: about 15 minutes | Config file: ~/.openclaw/openclaw.json
Your tool hands the question to Asale on your computer, Asale passes it to the market, and the market assigns it to some seller's computer, which asks the vendor. The machine talking to the vendor is the seller's, not yours — all you need is to reach Asale's own servers.
Step 1: Install the Asale client and sign in
Not installed yet? Work through Install the client: download → install → register and sign in on the Account page.
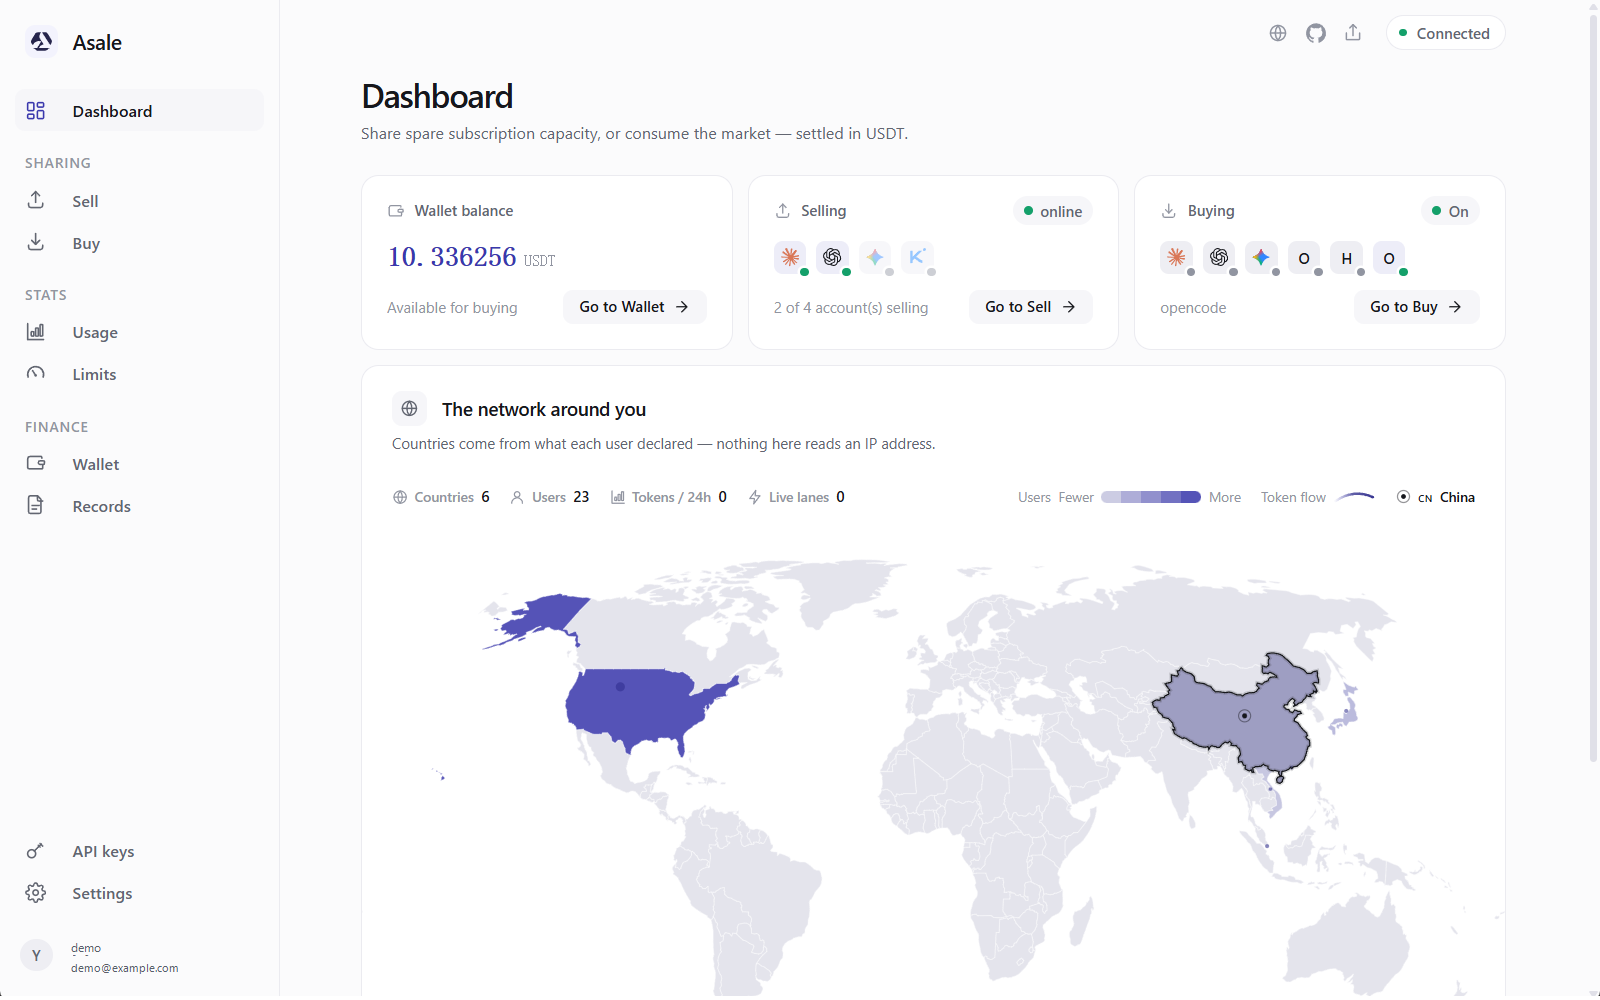
Step 2: Put some USDT in the wallet
- Wallet → Deposit → pick a chain
Wallet on the left → Deposit → pick Solana or TRON.
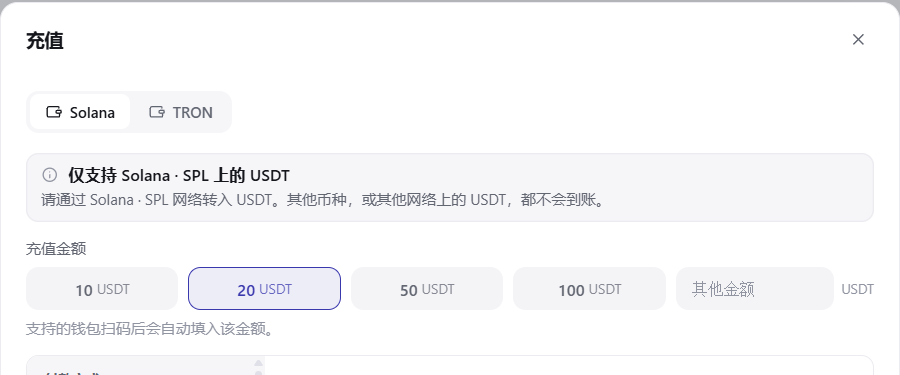
- Scan the QR code or copy the address and send
From a phone wallet, scan the QR code; from an exchange, open the USDT withdrawal page, set the network to the one you just picked, paste the address and confirm.
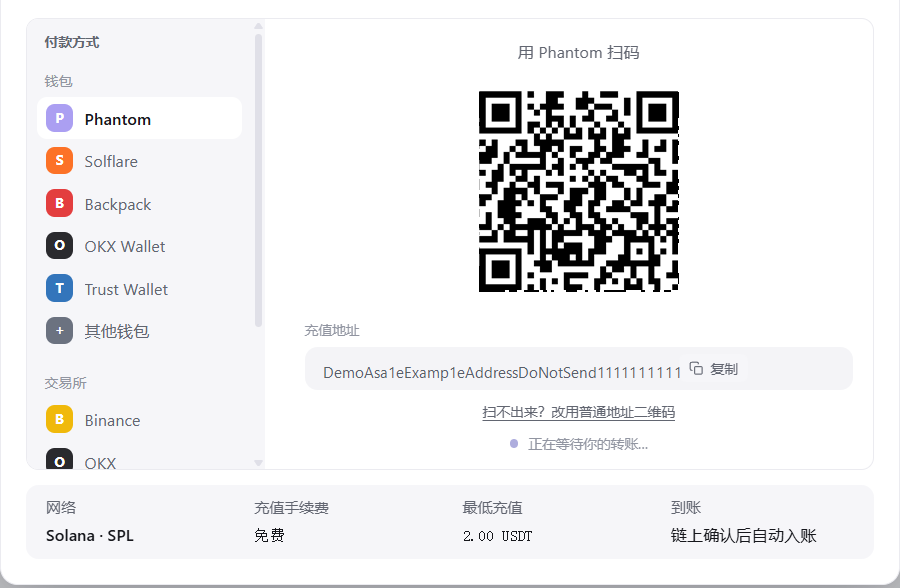
- Wait for it to arrive
Detected → confirming → added to your balance. For a first go, 5–10 USDT is plenty.
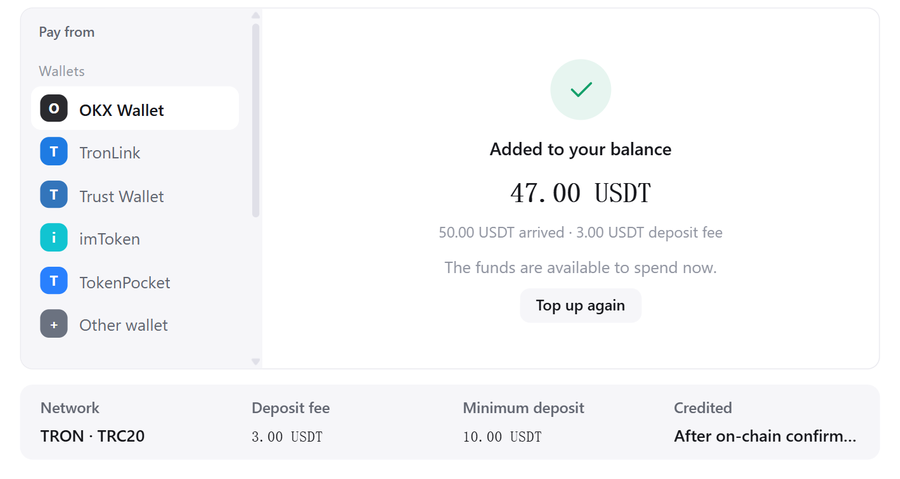 Pick the wrong chain and the money cannot be recovered
An address is bound to a chain. Go by the network name written above the QR code on the deposit page.
Step 3: Install OpenClaw on your computer
If you already have it, skip to step 4.
- Install Node.js first
Open nodejs.org and click the green LTS button to download and install. Afterwards open a new terminal window and type
node -v; you should see a version number.
- Install OpenClaw following its own instructions
How OpenClaw is installed is whatever its own site says (commands can change between releases). The Quick setup on docs.openclaw.ai currently leads with the install script.
macOS / Linux:
curl -fsSL https://openclaw.ai/install.sh | bashWindows (PowerShell):
iwr -useb https://openclaw.ai/install.ps1 | iex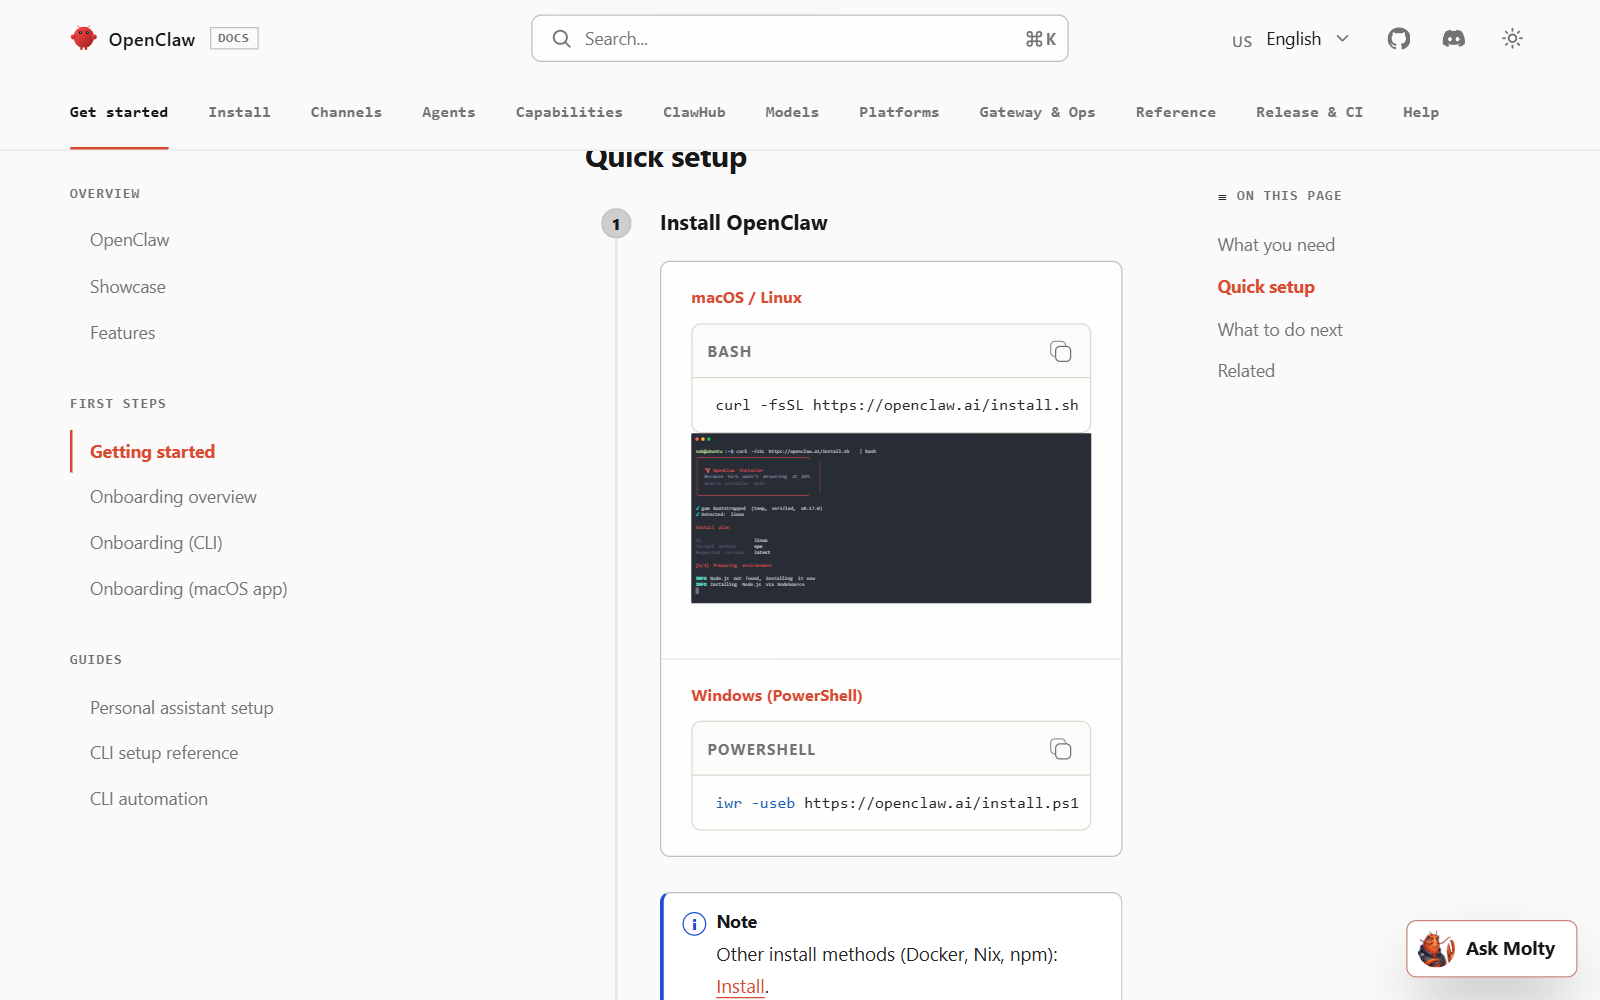
The script installs Node.js too if it is missing, so skipping the previous sub-step does no harm. To install via npm, Docker or Nix, follow the Install link in the Note on that page; the npm form is
npm install -g openclaw@latest. - Check that it installed
openclaw --versionA version number means you are set.
- Run it once first
Start OpenClaw once and quit. That makes it create its own config directory,
~/.openclaw/, which is what lets Asale detect it.It will not install on macOS / Linux and a screenful of red appearsIf the red text contains
EACCESorpermission denied, it cannot write into a system directory. Do not force it withsudo— move the install location into your own home directory instead:mkdir -p ~/.npm-global npm config set prefix ~/.npm-global echo 'export PATH=~/.npm-global/bin:$PATH' >> ~/.zshrc source ~/.zshrcIf you use bash, replace
~/.zshrcwith~/.bashrc.
Step 4: Turn on OpenClaw's buy switch
Turning the switch on rewrites its config file. Open a fresh window before you do it.
Buy on the left → find OpenClaw → turn on Buy tokens for this tool.
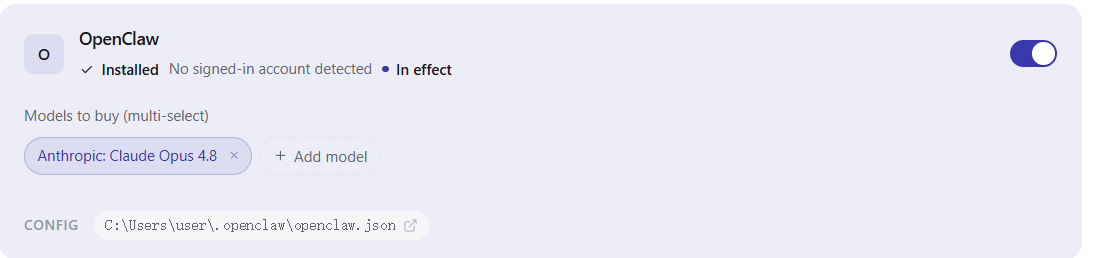
If it still says "Not detected": check you did that final launch in step 3 (so ~/.openclaw/ exists), then click Refresh.
Step 5: Tick the models you allow
Expand Models to buy (multi-select) and tick the ones you are willing to spend on; each shows its current market price.
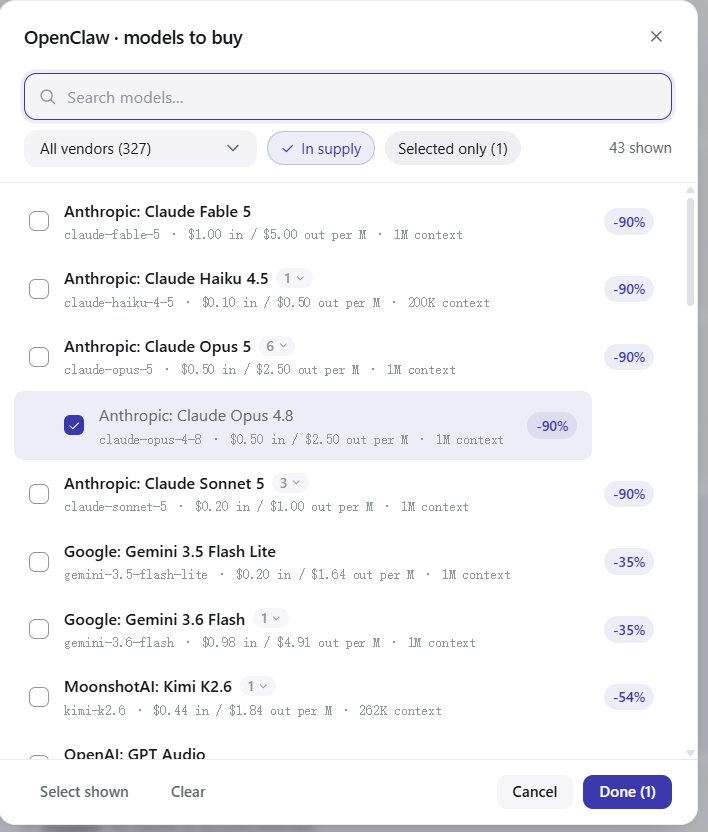
Models you have not ticked are refused locally: the request never leaves your computer and costs nothing.
Step 6: Restart OpenClaw
The config is read once, at startup. Quit OpenClaw completely and open it again.

Step 7: Confirm it really went through the market
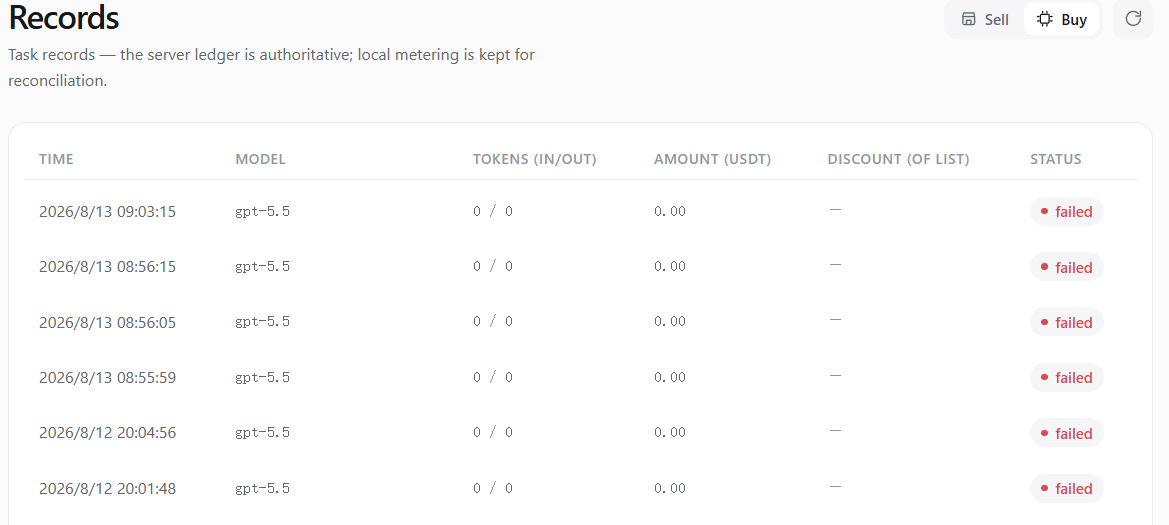
Start OpenClaw, ask anything, then go back to Asale → Records → Buy tab; that request should be there: time, model, token count, and how much USDT it cost.
What actually changed on disk
| File |
|---|
~/.openclaw/openclaw.json |
Backed up before the first write and restored exactly when you turn the switch off. The Buy page has an Open config button if you want to look.
Why its address has an extra /openclaw in it
Requests from the other tools each have their own shape, so Asale can tell at a glance who sent them. OpenClaw cannot be told apart that way — its requests can look exactly like Claude Code's or Codex's, and the content alone does not distinguish them.
So Asale adds an /openclaw segment to its address and identifies it by that. Delete that segment and OpenClaw's requests get treated as Codex's — using Codex's switch and Codex's chosen models. All wrong.
In normal use you will never notice this; Asale writes it for you. You only run into it if you open the config file yourself and find a tool name inside the URL odd — do not remove it by hand.
What one request costs
Before each question, the system holds an amount from your balance based on the most this could possibly cost — usually quite a bit more than it actually will. When the answer finishes, it settles at real usage and the excess returns immediately. A request that errors, produces no usage, or that you interrupt with Ctrl+C is not charged.
Turning it off again
Turn OpenClaw's switch off on the Buy page, then restart OpenClaw. The config is restored exactly.
Common questions
I turned on OpenClaw, so why do the records show the model Codex has selected?
The address in the config is missing the /openclaw prefix. Go back to the Buy page, click Re-apply, then restart OpenClaw.
Does turning on OpenClaw's switch affect Claude Code or Codex? No. Each tool's buy switch and model list are entirely independent.
"503 no supply"? Nobody currently has idle capacity for that model. Switch models or wait.
"402 insufficient balance" when I have money? The hold is based on the most it could possibly cost, usually quite a bit above the real figure, so a small balance gets stuck here easily. Deposit a bit more.